In order to begin building Java applications it is important to have an integrated development environment (IDE). We will be using IntelliJ IDEA as our IDE. It provides a free community edition and is the most powerful IDE on the market, providing a range of tools and features for streamlined coding, debugging, building, testing, and compiling Java applications. It’s highly praised for its intelligent code completion, robust navigation, and deep integration with various development tools, making it an excellent choice for both beginners and experienced developers
Download IntelliJ IDEA
- Go to the official JetBrains website.
- Choose your operating system (Windows, macOS, Linux).
- Download the Community edition (free) or Ultimate edition (paid with a free trial).
Install IntelliJ IDEA
- After installation, open IntelliJ IDEA.
- Run the installer.
- Follow the installation wizard, accepting the default options.
- Choose to create desktop shortcuts if desired.
Create a New Java Project
To begin building a Java application we are going to create new project in IntelliJ and will be using gradle as our build tool. Gradle is a versatile build automation tool that simplifies project management by automating tasks such as compiling, testing, and deploying code, and it’s powerful due to its flexibility, scalability, and ability to handle complex dependencies and multi-project builds efficiently.
Create a New Gradle Project
Open IntelliJ IDEA
Launch IntelliJ IDEA from your desktop or start menu.
Create a New Project:
From the top left hand corner of your screen, select File -> New -> Project....
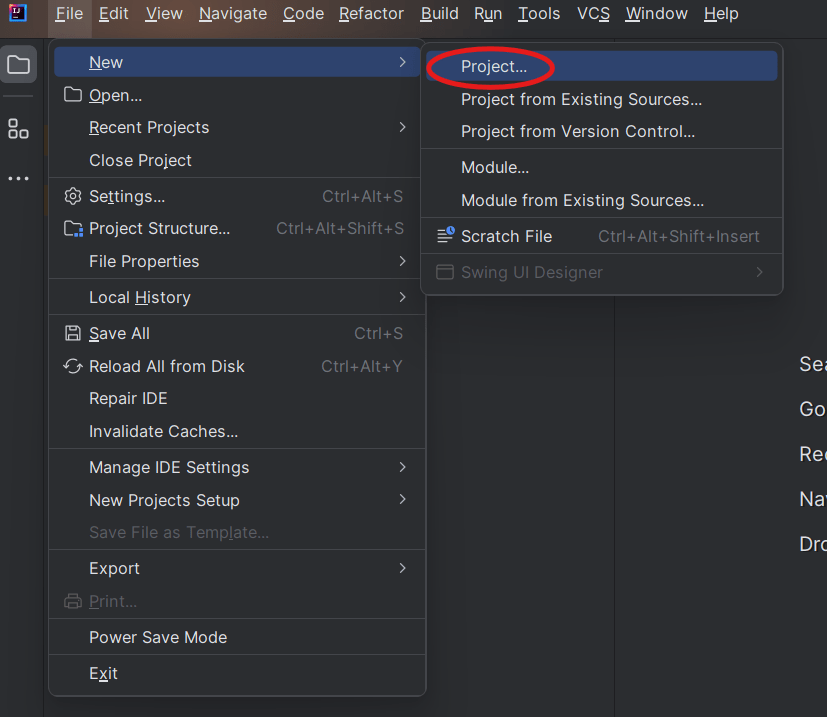
- Choose a name for your project. We will call this one
HelloWorld. - Select a location for your project files. We will be using
~\Documents\Projects\Tutorials. - The language will be
Javaand our build system will beGradle. - Make sure to select your JDK version that was installed in the previous tutorial. We will be using
OpenJDK 21.0.1for this application. - We will use
Kotlinas our language in Gradle. (Don’t worry about this for now) - There is an option to add sample code to your application. Lets use this feature to save time!
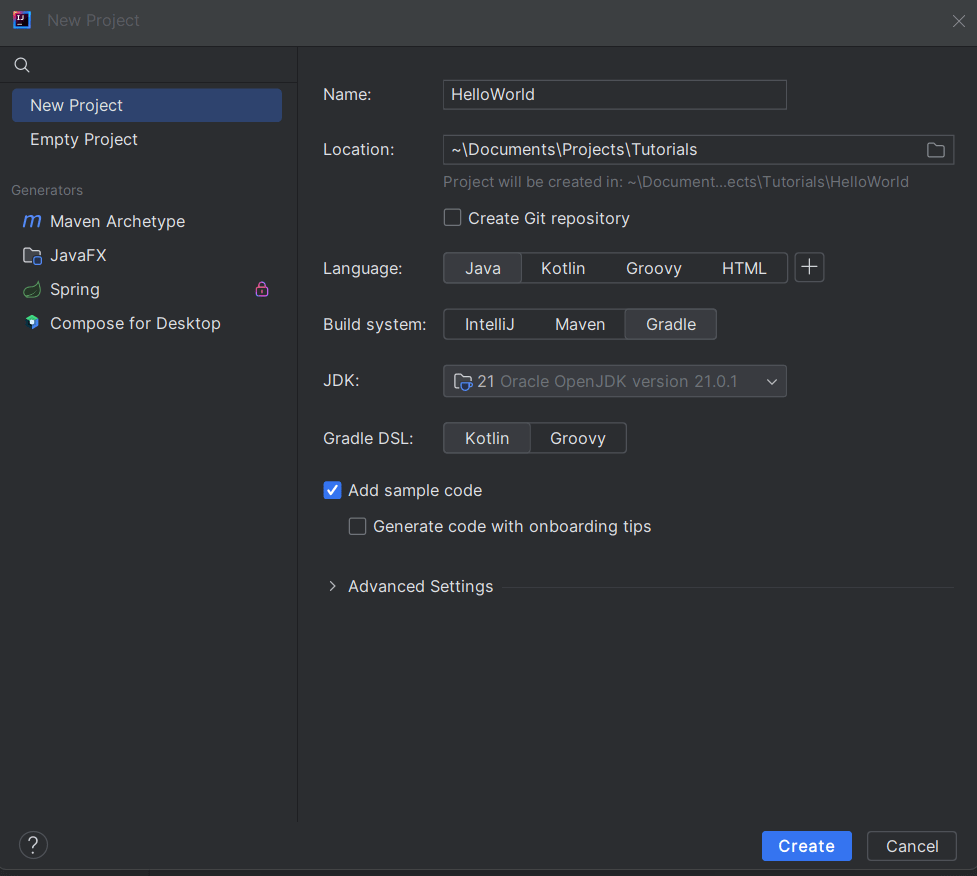
Wait for IntelliJ to Set Up the Project
- IntelliJ will now create the Gradle project. This might take a moment as it downloads dependencies and sets up the build environment.
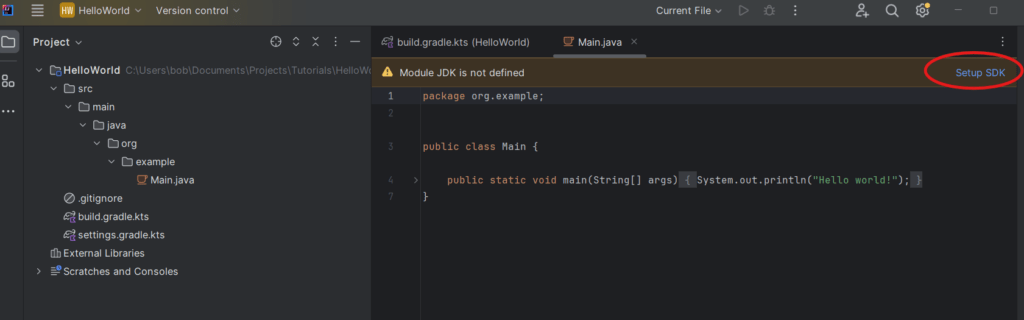
- If your JDK is not defined, select Setup SDK.
Understand the Code
We will cover each line of code contained in this project. These concepts might be new to you, but having a solid understanding of each keyword will better your understanding of what the code is doing. This will only be a high level overview and each section will be explained in more detail later in the series.
What is a Package?
The very first line of code starts with package org.example. A package is just a way to organize your Java files (or classes) to help keep your code manageable and modularized. You will notice that the package name matches the folders that contain your Main.java file.
What is a Class?
The next portion of the code is public class Main. In Java, everything is made up of classes. These are a blueprint for creating objects. An object just defines a set of properties (variables) and methods (functions) that the objects created from the class can use. Variables hold data and methods operate on that data. In our example, Main is a simple class that contains just one method, the main method.
The Main Method
- The
mainmethod is the entry point of any Java application. When you run your program, themainmethod is the first thing that gets executed. A method always has parenthesis after it, along with curly braces and is just used to execute a piece of code. - The method signature
public static void main(String[] args)can be broken down as:public: This means the method can be accessed from outside the class.static: This means the method belongs to the class itself, not to instances of the class. (You will learn more about objects and classes later on.)void: This means the main method doesn’t return any value. Methods like main just execute a block of code and return some type of data. void is just a placeholder, to specify that no data will be returned after the method runs.String[] args: This is an array ofStringarguments passed to the method when the program starts. For now, you can think of it as a way to pass information to the method, though it’s not needed for our simple example.

Inside the Main Method
Beside the main(String[] args) method there is a set of curly braces. Everything inside of the curly braces is code that you want to execute. In this example we see the following line:
System.out.println("Hello world!");System.outis just a library that contains other methods for you to use. In this case we are usingprintln().println("Hello world")tells your computer that we want to print this text to the screen. In Java, text is called a String and output goes to a terminal. Terminals like command prompt are just a text-based interface where you can type commands to interact with your computer’s operating system, run programs, and manage files without using a graphical interface.- All lines of code in Java are called statements, and must end with a semicolon. This tells the compiler where each line of code ends.
- All statements are inside of curly braces are called blocks of code. In future examples we will expand upon displaying simple text by adding more statements to this block.
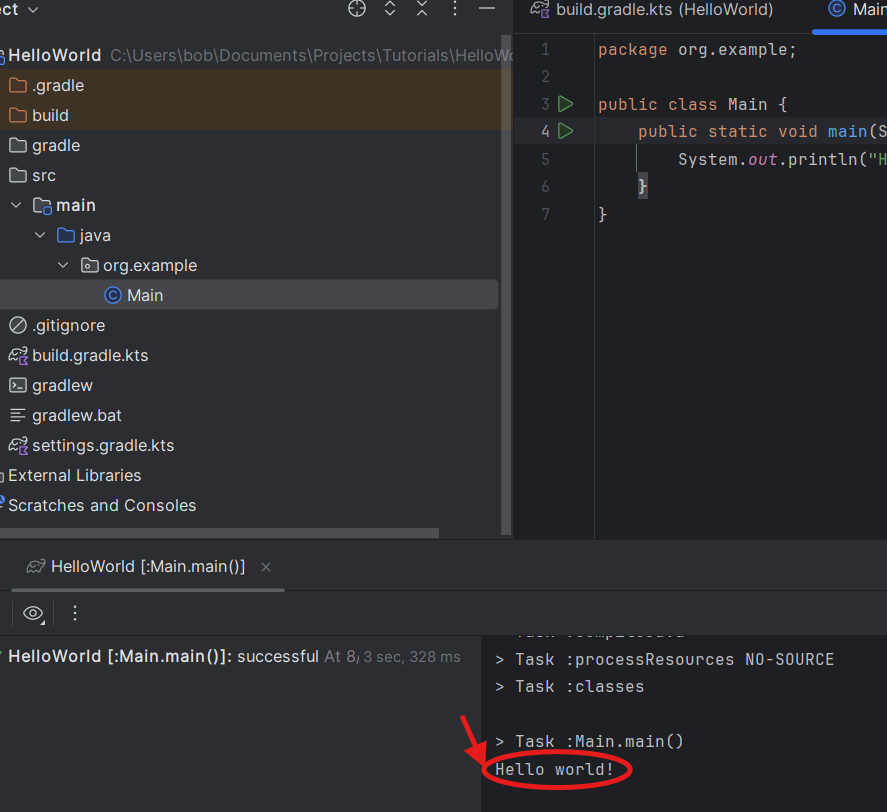
Run the Application With IntelliJ
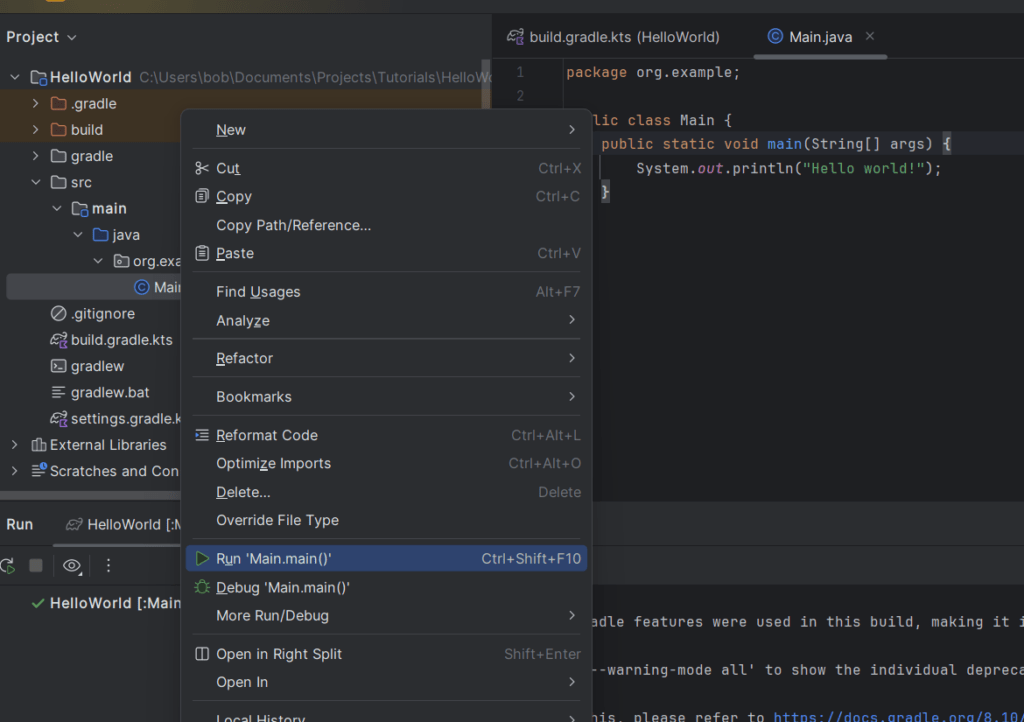
- Right-click on the
Mainclass in theProjectpane. - Select
Run 'Main.main()'.
- You should see
Hello world!printed in theRuntool window at the bottom.
Conclusion
Congratulations, you have set up a Gradle-based Java project in IntelliJ IDEA, configuring the project, and creating a simple Java class to print “Hello world!” This setup allowed for the successful compilation and execution of the program, demonstrating how to print text to on your computer!
Check out part 3 of this series to start learning the basics of Java: https://jasontokarski.com/2024/08/20/master-java-quickly-part-3/