Login forms have become an indispensable element of user interfaces, become widely used across online platforms. Serving as a gateway to access services and manage accounts, having the ability to design one is crucial for any developer. This article will guide you through the process of building visually appealing front end layout in NextJS using Chakra UI for form components. Future articles will provides instructions on how to build the backend functionality to store and manage user records.
Prerequisites
You will need NodeJS installed on your machine in order to run a next application and import necessary dependencies. The NodeJS website offers a convenient installer to begin building web applications. Use the link below to download the installer and begin running node.
Create a NextJS Project
Create a new NextJS project using the following command:
npx create-next-app@latest auth-portal
cd auth-portal
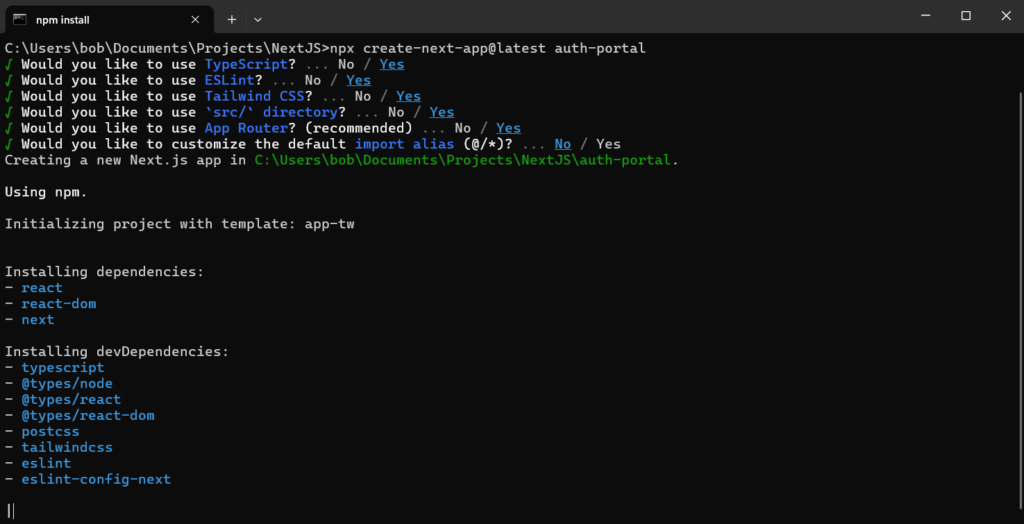
Here are example settings for the project. We will be utilizing TypeScript for its robust typing system that improves code reliability and maintainability.

Install Chakra UI
Run the following command to install Chakra UI and its peer dependencies. Chakra offers an intuitive and customizable component library for designing user interfaces.
npm install @chakra-ui/react @emotion/react @emotion/styled framer-motionUpdate the Project Structure
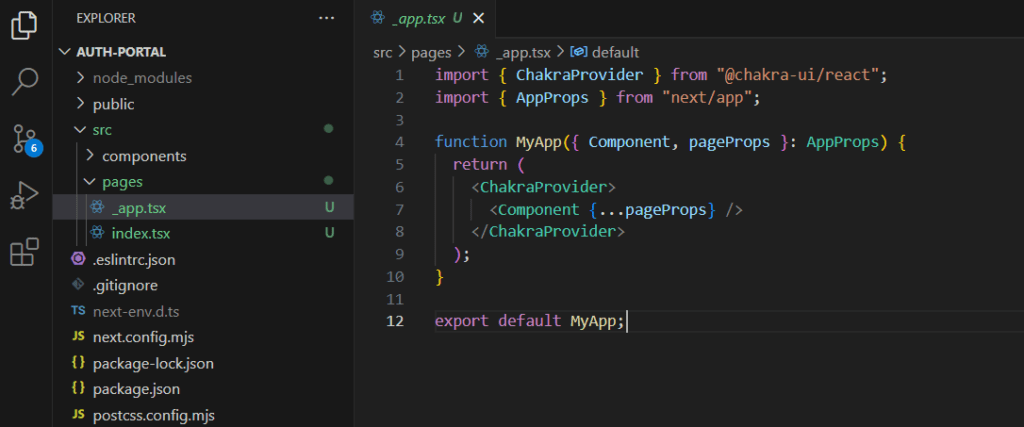
We will be removing the default app folder and instead create a pages and components folder. Is diagram of our new folder structure.
auth-portal/
├── public/                    # Static files (images, fonts, etc.)
├── src/
│   ├── components/            # Reusable React components
│   ├── pages/                 # Next.js pages
│   │   ├── _app.tsx           # Custom App component for ChakraProvider
│   │   ├── index.tsx          # Home page
Add Chakra Provider
Inside of _app.tsx we will wrap our application with a ChakraProvider JSX element. This will give all our pages access to the Chakra component library.
import { ChakraProvider } from "@chakra-ui/react";
import { AppProps } from "next/app";

function MyApp({ Component, pageProps }: AppProps) {
  return (
    <ChakraProvider>
      <Component {...pageProps} />
    </ChakraProvider>
  );
}

export default MyApp;
Setup Home Page
The index.tsx file will represent our landing page where users will begin after navigate to the home page. For now we are just going to route to a login page that will be created later in this tutorial.
import { useEffect } from 'react';
import { useRouter } from 'next/router';

const IndexPage: React.FC = () => {
  const router = useRouter();

  useEffect(() => {
    router.push('/login');
  }, [router]);

  return null;
};

export default IndexPage;
Custom Form Input
We are going to create a custom styled form input component that will be used by both our login and sign up pages. Inside of our components folder we create a file called FloatingLabelInput.tsx. Here is the source code for this custom element.
import React from 'react';
import { FormControl, FormLabel, Input } from '@chakra-ui/react';

interface FloatingLabelInputProps {
  id: string;
  label: string;
  type?: string;
}

const FloatingLabelInput: React.FC<FloatingLabelInputProps> = ({ id, label, type = 'text'}) => {
  return (
    <FormControl position="relative" variant="floating" id={id}>
      <Input
        id={id}
        placeholder=" "
        type={type}
        borderColor="gray.300"
        focusBorderColor="blue.500"
        _placeholder={{ opacity: 0 }}
      />
      <FormLabel
        htmlFor={id}
        position="absolute"
        top="-1.25rem"
        left="1rem"
        zIndex="1"
        px="1"
        bg="white"
        color="gray.500"
        fontSize="sm"
        pointerEvents="none"
        transform="translateY(0.5rem)"
        transition="all 0.2s"
      >
        {label}
      </FormLabel>
    </FormControl>
  );
};

export default FloatingLabelInput;
Create a Login Page
Now we begin creating our login page. It will be a simple login form contained on the left hand portion of the screen. The right half will be a simple gradient. We will be using our custom input label component from the previous section. The name of the file will be login.tsx and will be contained in the pages folder. Here is the code:
import { Box, Button, Container, Text, Link, VStack } from '@chakra-ui/react';
import { useRouter } from 'next/router';
import NextLink from 'next/link';
import FloatingLabelInput from '@/components/FloatingLabelInput';

const LoginPage: React.FC = () => {
  const router = useRouter();

  return (
    <Container maxW="full" height="100vh" p={0} display="flex">
      <Box width="50%" bg="white" p={8} display="flex" alignItems="center" justifyContent="center">
        <VStack spacing={4} alignItems="flex-start" width="full" maxW="sm">
        <Text fontSize="2xl"mb={2} align="center" fontWeight="bold">Login Form</Text>
        <FloatingLabelInput id="username" label="Username" />
        <FloatingLabelInput id="password" label="Password" type="password" />
          <Button colorScheme="blue" width="full" maxW="sm">
            Login
          </Button>
          <NextLink href="/signup" passHref>
            Dont have an account?{' '}
            <Link color="blue.500">
              Get Started
            </Link>
          </NextLink>
        </VStack>
      </Box>
      <Box
        width="50%"
        height="100%"
        bgGradient="linear(to-r, blue.500, blue.700)"
        display="flex"
        alignItems="center"
        justifyContent="center"
      />
    </Container>
  );
};

export default LoginPage;
Create a Sign Up Page
Next we will create a similar sign up page that will collect a username and password from a user. It will use the same styles as our login page. The name of the file is signup.tsx and place it inside the pages folder.
import { Box, Button, Container, Text, Link, VStack } from '@chakra-ui/react';
import { useRouter } from 'next/router';
import NextLink from 'next/link';
import FloatingLabelInput from '@/components/FloatingLabelInput';

const SignInPage: React.FC = () => {
  const router = useRouter();

  return (
    <Container maxW="full" height="100vh" p={0} display="flex">
      <Box width="50%" bg="white" p={8} display="flex" alignItems="center" justifyContent="center">
        <VStack spacing={4} alignItems="flex-start" width="full" maxW="sm">
        <Text fontSize="2xl"mb={2} align="center" fontWeight="bold">Sign Up Form</Text>
        <FloatingLabelInput id="username" label="Username" />
        <FloatingLabelInput id="password" label="Password" type="password" />
          <Button colorScheme="blue" width="full" maxW="sm ">
            Sign Up
          </Button>
          <NextLink href="/login" passHref>
            Already have an account?{' '}
            <Link color="blue.500">
              Log In
            </Link>
          </NextLink>
        </VStack>
      </Box>
      <Box
        width="50%"
        height="100%"
        bgGradient="linear(to-r, blue.500, blue.700)"
        display="flex"
        alignItems="center"
        justifyContent="center"
      />
    </Container>
  );
};

export default SignInPage;
Conclusion
Congratulations! You have now created your very own font end portal using NextJS and Chakra UI. In the next part of this series we will create the backend server that will handle authentication, user creation, and login functionality. Then we will connect our front end backend applications together.


Leave a Reply