This article gives a comprehensive overview of setting up the an environment to starting building Java applications. In order to begin coding in Java you will first need to install the Java Development Kit. The Java Development Kit (JDK) is a software development environment used for building Java applications. It is an essential tool for developers who want to write, compile, and run Java programs. The JDK includes several key components:
- Java Virtual Machine (JVM): The JVM is the engine that runs the compiled Java bytecode on your system. It abstracts away the underlying hardware, allowing Java applications to be platform-independent.
- Java Compiler (
javac): This tool converts Java source code (written in.javafiles) into bytecode (stored in.classfiles) that can be executed by the Java Virtual Machine (JVM). - Java Runtime Environment (JRE): The JRE provides the libraries, Java class loader, and JVM needed to run Java applications. While the JRE is sufficient for running Java programs, the JDK includes the JRE plus additional tools for development.
Download the Java Development Kit (JDK).
Visit the Oracle JDK download page
- Open your browser and go to the official Oracle JDK download page: Oracle JDK Downloads.
- Choose the latest version of the JDK.
Select your version of Windows
Scroll down to find the Windows installer. Choose the appropriate one depending on your system architecture (e.g., x64 Installer for 64-bit systems).
Download the installer
Review and accept the Oracle License Agreement if prompted. Click on the link to download the .exe installer file.
Install the JDK
Run the Installer
Once the download is complete, navigate to your Downloads folder and double-click the JDK installer file (jdk-xx_windows-x64_bin.exe).
Follow the Installation Wizard
- The installer will open, guiding you through the installation process. Click
Nextto proceed. - Choose the installation location (the default is usually
C:\Program Files\Java\jdk-xx.x.x). You can change it if needed, but the default location is recommended.
Complete the Installation
- Click
NextorInstallto begin the installation process. - The installer will copy the necessary files to your system. Once completed, click
Closeto finish the installation.
Set Up Environment Your Variables
In order for your system recognizes Java commands, you need to set up environment variables. This will allow your command prompt to find Java automatically when you compile and run your applications
Open the Environment Variables window
Right-click on your Windows Icon on your desktop or in File Explorer.
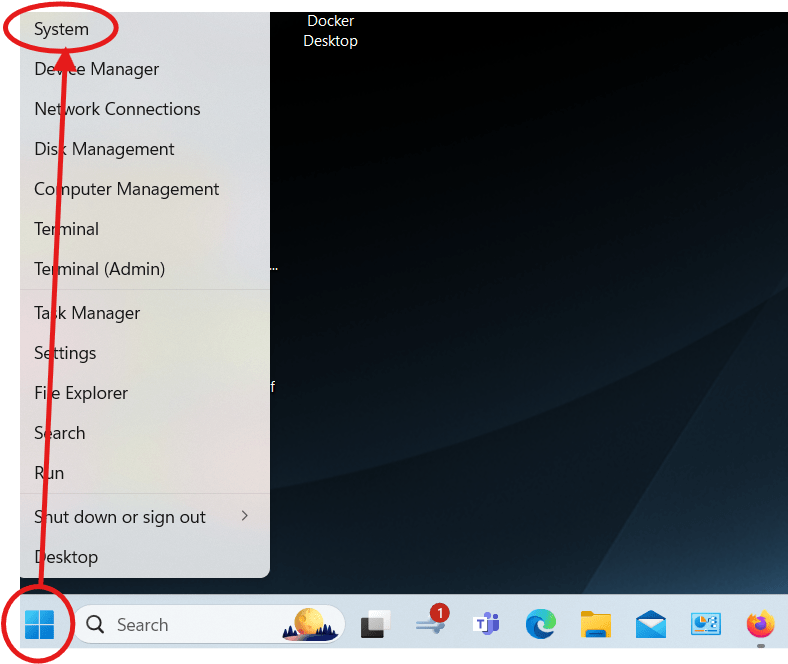
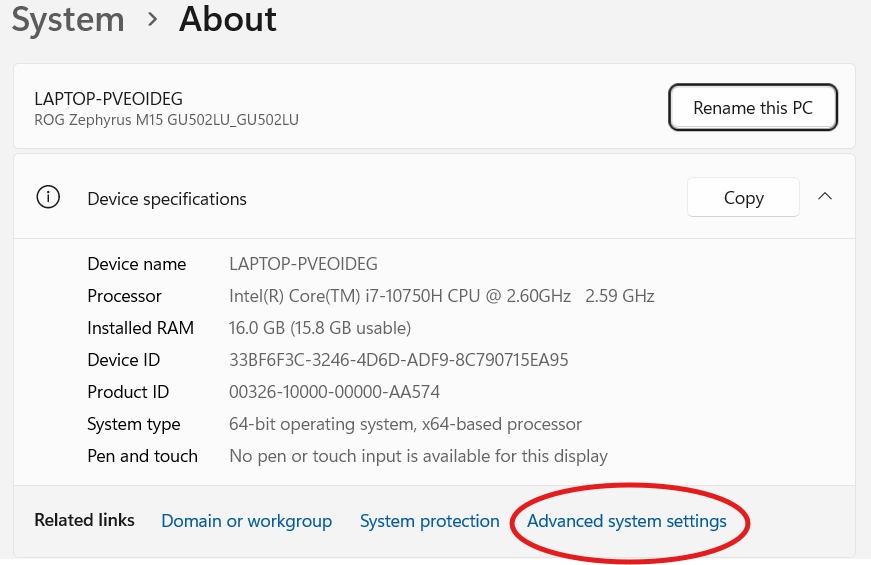
Select Advanced system settings -> Environment Variables....
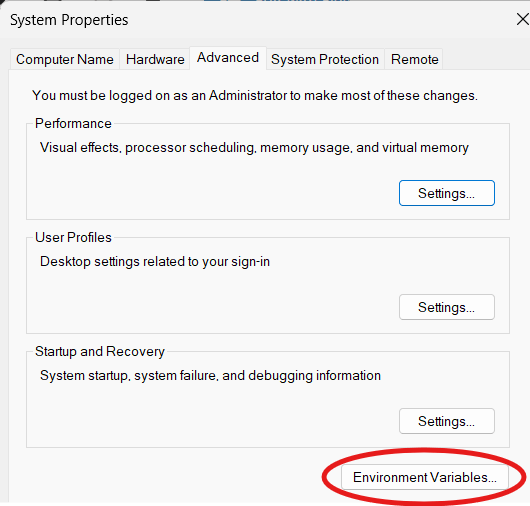
Set the JAVA_HOME Variable
- In the Environment Variables window, under
System variables, clickNew.... - For
Variable name, enterJAVA_HOME. - For
Variable value, enter the path to your JDK installation directory (e.g.,C:\Program Files\Java\jdk-xx.x.x). - Click
OK.
Add Java to the PATH Variable
- In the Environment Variables window, find the
Pathvariable underSystem variables, and select it. ClickEdit.... - Click
Newand add the following path:
%JAVA_HOME%\bin- Click
OKto close all windows.
Verify the Installation
- Open Command Prompt:
- Press
Win + R, typecmd, and pressEnterto open the Command Prompt.
- Press
- Check the Java version:
- In the Command Prompt, type the following command and press
Enter:
- In the Command Prompt, type the following command and press
java -versionYou should see output indicating the installed version of Java, like:
java version "xx.x.x"
Java(TM) SE Runtime Environment (build xx.x.x-xx)
Java HotSpot(TM) 64-Bit Server VM (build xx.x.xx-x, mixed mode)- Test the
javaccommand:
To ensure that the Java compiler is set up correctly, type:
javac -versionThis should return the version of the Java compiler.
Conclusion
Congratulations, if your command prompt is displaying output for your java and javac commands, then you have successfully installed JDK on your system. Continue onto part 2 of this series to setup an Integrated Development Environment that you can use to start building Java applications.
Link to Part 2: Master Java Quickly Part 2: IDE Setup and First Application – Learn Code (jasontokarski.com)